Activity 5.5.1 Adding colour
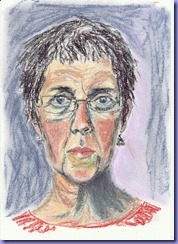
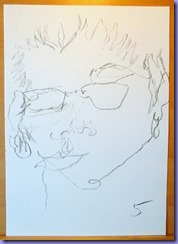
 | My self-portrait from the last chapter.
I printed it on A4 paper, 160 g, to paint with soft pastels. |
| | |
 | I began with a light base colour and added the darker shades. At the end I put in the highlights on the nose, the lower lip and in the eyes. The lines of the copy are still visible at the mouth and the eyes.
I did not blend the pastel marks, and when I wanted another shade of colour I added marks with another pastel stick. |
For the darkest shades I used dark brown, purple and blue. For the background I first painted the lilac-coloured layer which is still visible on the right of the face, and then added purple-grey strokes. I think the uncovered part of the first layer gives some depth to the drawing.
Extra activity: Variations of the completed picture using Picasa
I have been using Picasa for photo editing since I started the Embroidery Taster with Sian. It is always fun to see what effects can be achieved by combining the various possibilities of the program, although after a few alterations I tend to lose track of what exactly I have done in what sequence. Here are some of my altered pictures.
 |  |
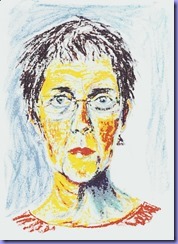
I like the above picture a lot, it has something witchy. Hair and background seem to blend into each other to a bark-like structure. Beside the original drawing, this gave an idea for the next activity.
| Reduction to basic colours. It is amazing to see that the likeness does not depend on natural colours. |
 |  |
| | I also like this version very much, it is very three-dimensional.
|
 |  |
| | |
I also like to work with reduction of tones. This variation gave me the idea for the next activity, although I did not work directly from the picture.
|  |
Activity 5.5.2 Developing my portrait further
Just recently my passion for hand stitching has woken up after a long pause, so I was courageous and started to do a stitched version. I wanted to use non-realistic colours, hand stitching and appliquéd pieces of cloth.
 | The background is made from old bed sheets, dyed with tea and pieced to a size slightly larger than A4. I transferred the lines of the portrait on the cloth and stitched the outlines. First I covered the face with a pale green piece of nylon stocking. On this I sewed half-transparent pieces of silk for the shades. |
The eyes were hand stitched and the mouth appliquéd and
framed with back stitch. | I stitched with sewing threads and MEZ embroidery cotton.
|
The back side
 |
Before I started stitching I backed the cloth with very thin cotton fabric, I think it is called cheese cloth. The back side is an interesting drawing in itself. I don’t think I could achieve this if I tried directly. You can still see the traces of the embroidery hoop. |
Meet Ms. Frankenstitch!
She does not look too happy.
| |
 e Having done the face - the drawing - the piece felt unfinished. So I added a background. I was very cross with myself for not having planned this from the beginning. e Having done the face - the drawing - the piece felt unfinished. So I added a background. I was very cross with myself for not having planned this from the beginning.
| The background is a half-transparent silk print in a warmer colour to connect to the mouth, stitched in rows of running stitch. Left of the head there is another piece overlayed, here only the outlines are stitched.
I cut away the stocking fabric from the face and neck, because the pale green did not go well with the background colour, the warmer tone of the tea-dyed cotton was much better. I also made a few alterations with the appliquéd pieces on the right cheek and the chin. |
I think the appliqué method has worked well around the eyes and on the right cheek. I would like very much to use this technique again, it is like playing with brushstrokes which can be pushed around. But then I will definitely spend more time chosing pieces of cloth. And I like the effect of the dense stitching pushing forward the areas with less stitching.

Just to remind myself that I do not always look so depressed I add a photograph of my brother and me having fun during a walk a week ago.
I am very happy that now I can stop looking so intently at my own face.


