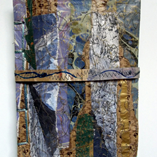
2.10.1 Make small trial sketchboos to try out stitch techniques
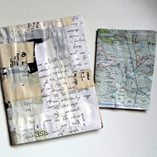
I coated a few of my recycled and embellished papers with medium acrylic gel to prepare them for use as covers and started with an A 6 folded stitch book with a few sheets of cartridge paper, getting more adventurous as I went along.
In Gwen Diehn’s book “The Complete Decorated Journal: a Compendium of Journaling Techniques” (Lark Crafts 2012, ISBN 978-1-4547-0203-0) I found very detailed instructions on binding books, among others the hint to use a heavy phone book or catalogue when making the holes. Very useful. The way of fastening several blocks of folded sheets also came from Gwen Diehn’s book – a cardboard wrap from a purchase very conveniently provided me with a perfect cover.
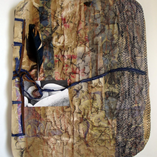
I discovered a liking for fastenings and used buttons and paper tassels.
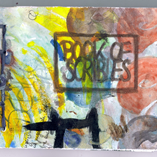
The Book of Scribbles is made with cartridge paper and an old poster that I used as desk cover for wiping brushes, trying out colours and printing blocks, smearing leftover paint and taking notes. I used such a desk cover also for book 8.
When cutting up old shirts I usually save the seams. They are very nice for this purpose.
I had to stop myself from making more and more books or I would have swamped my workspace – still a definite possibility. I am so looking forward to taking them on walking tours and fill them with my journal, drawings and findings!
2.10.2 Make a stitch or stab stitch book with letters as a theme
1. I had been looking for a poem for some time already and settled on one by e. e. cummings.
n
othI
n
g can
s
urPas
s
the m
y
SteR
y
of
s
tilLnes
s
I like the way he breaks up the words and slows down reading by the placing of the letters and the use of capitals. Each line and each word builds a unit that has also a strong visual quality. In the book I wanted to keep these images.
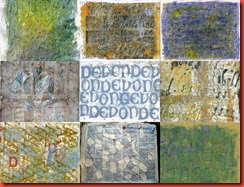
The book as a whole is a bit larger than A4, 25x31 cm, although the pages vary in size. I completed the pages before binding them, which was the last step as far as the contents is concerned. As the poem deals with abstract concepts I decided to keep the colours in a “natural” range, using lead pencil, charcoal, bistre, black and white and occasional splashes of colour. The papers were mostly prepared for the book, a few were made in Module 2 and Module 1, and I also used tracing paper and handmade paper from ages ago, very soft and bumpy.
As the papers were meant to be read I used the stab stitch method.
I am pleased with the variety and contrast of the pages (except for the first three, where the letters are too much alike). The muted colour range was a good decision, white being essential. The backs of the pages were left white or painted with gesso, because I wanted to have only one picture per page to keep it clear.
An interesting alternative might be to use clear primarly colours. I liked to work with the restrictions on layout, typography and colours and see which ideas can be developed within such a framework.
The book is too large, however, for the kind of cover I used. I did not manage to get the collaged paper really flat. Also the various sizes of the pages seem not to fill the covers enough. So next time I would try sturdy cardboard as a base for the cover.
Time required: about 12 hours
Estimated cost: around 2 € in colours from my stock. All the papers are recycled.
Half way through the work I read the brief again. To my surprise it says to first make the book and then work in it. (Mantra: read the brief carefully … iread the brief carefully …) It seemed to me that this is a different process from my poem book.
So here comes
2. A book around size A5, 22c16 cm. My theme is the Alice Walker quote I used before: “feathers, shells and sea-shaped stones”. I used A4 size (more or less) papers, some of them made in Modules 1 and 2, and others from my collection.
These are some of the papers. I folded them half way and stab stitched them with silk perle. I glued in tracing paper for protection where I had used oil pastels. The cover was also made in Module 2, glued and stitched with the words, the fastening is made from a strip of the same sheet with a painted and stitched wave. It is tucked into a loop of braided silk perle left over from binding.
The process of working in this book was fascinating. The papers were already full of visual information and triggered off a lot of ideas, but it also was a challenge to work with what was already there, for instance the paper with the glue on pages 19-20. The opposing pages were usually very different to begin with, and whereas I did not work expressly to make them correspond I saw it was unavoidable, even in contrast (for example on the pictures 11 and 14).
I am quite satisfied with this book and like it a lot, not least, I think, because it came as a surprise. I could use a wide range of materials and techniques, although next time I might do some stitching and more variations of handwriting. The choice of colours is still influenced by my Cornwall holiday. Sometimes I might have created more contrast, for example in picture 17, left, some lighter tint or white might have been helpful.
Time required: about 14 hours
Cost: as in the first book there were no direct costs. I estimate the use of materials at around 2 €.
So this is my work for the last chapter of Module 2.
